 NOTE: This toolbar item is available only to admin users.
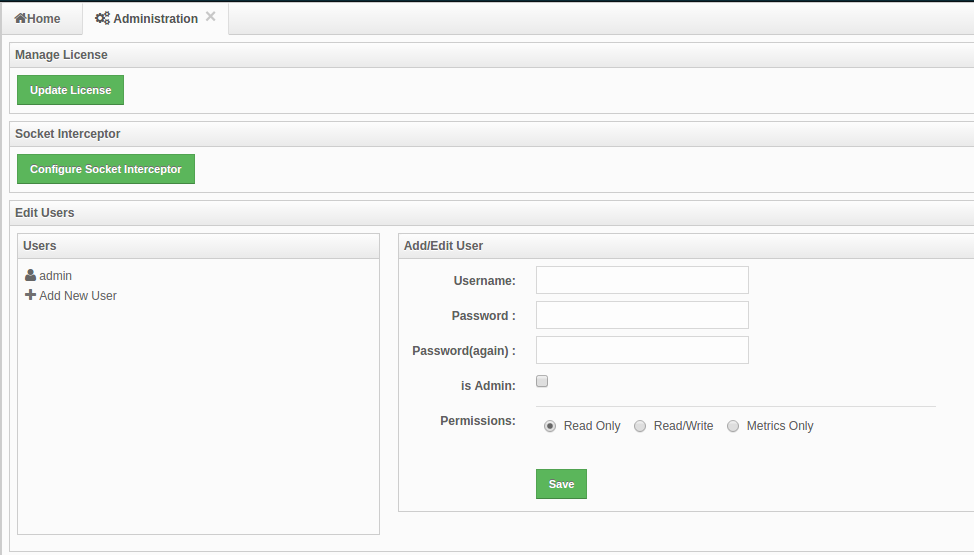
The Admin user can add, edit, and remove users and specify the permissions for the users of Management Center. To perform these operations, click on the Administration button located on the toolbar. The page below appears.

Users
To add a user to the system, specify the username, e-mail and password in the Add/Edit User part of the page. If the user to be added will have administrator privileges, select isAdmin checkbox. Permissions field has the following checkboxes:
- Metrics Only: If this permission is given to the user, only Home, Documentation and Time Travel items will be visible at the toolbar on that user's session. Also, the users with this permission cannot browse a map or a cache to see their contents, cannot update a map configuration, run a garbage collection and take a thread dump on a cluster member, or shutdown a member (please see Monitoring Members).
- Read Only: If this permission is given to the user, only Home, Documentation and Time Travel items will be visible at the toolbar at that user's session. Also, users with this permission cannot update a map configuration, run a garbage collection and take a thread dump on a cluster member, or shutdown a member (please see Monitoring Members).
- Read/Write: If this permission is given to the user, Home, Scripting, Console, Documentation and Time Travel items will be visible. The users with this permission can update a map configuration and perform operations on the members.
After you enter/select all fields, click Save button to create the user. You will see the newly created user's username on the left side, in the Users part of the page.
To edit or delete a user, select a username listed in the Users. Selected user information appears on the right side of the page. To update the user information, change the fields as desired and click the Save button. To delete the user from the system, click the Delete button.
License
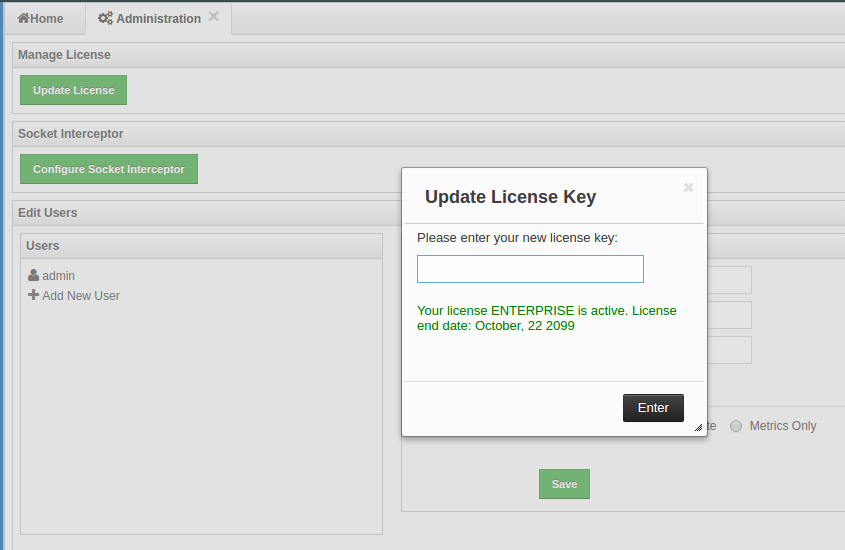
To update the management center license, you can click on the Update License button and enter the new license code. You will see the expiration date of your current license on the screen.

Socket interceptor
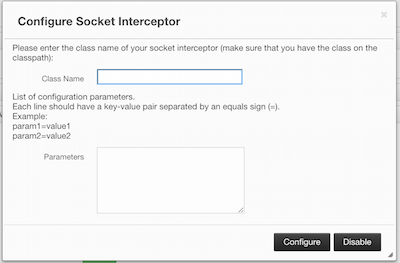
If the Hazelcast cluster is configured to use a socket interceptor, you need to configure a socket interceptor for Management
Center as well. You can click on the Configure Socket Interceptor button, enter the name of your socket interceptor class
and the configuration parameters. Click the Configure button to save your configuration and enable socket interceptor.
This class needs to be on your classpath when you're starting Management Center. The configuration parameters you provide
will be used to invoke the init method of your socket interceptor implementation if it has such a method.

Following is a sample socket interceptor class implementation:
package com.example;

import java.io.IOException;
import java.io.InputStream;
import java.io.OutputStream;
import java.net.Socket;

public class SampleSocketInterceptor {
    // this method is optional
    public void init(Map<String, String> parameters) {
        // here goes the initialization logic for your socket interceptor
    }

    public void onConnect(Socket connectedSocket) throws IOException {
        // socket interceptor logic
        try {
            OutputStream out = connectedSocket.getOutputStream();
            InputStream in = connectedSocket.getInputStream();
            int multiplyBy = 2;
            while (true) {
                int read = in.read();
                if (read == 0) {
                    break;
                }
                out.write(read * multiplyBy);
                out.flush();
            }
        } catch (IOException e) {
            throw e;
        }
    }
}
A socket interceptor implementation needs to satisfy the following two conditions:
-
Have a no-argument constructor
-
Have a public
onConnectmethod with the following signature:void onConnect(Socket connectedSocket) throws IOException
Disabling socket interceptor
To disable the socket interceptor, you need to click the Configure Socket Interceptor button first and then click the Disable button on the dialog.
